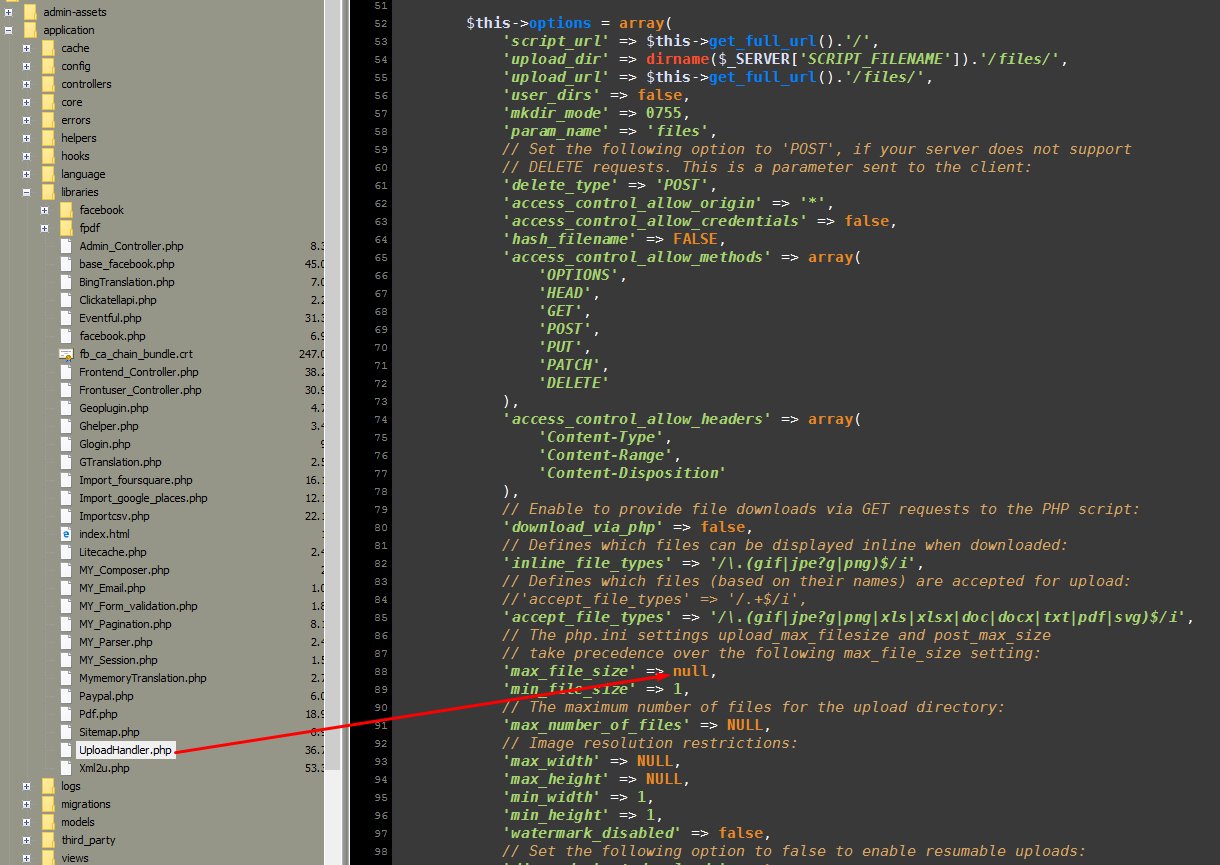
Edit file application\libraries\UploadHandler.php, line 86:
‘max_file_size’ => null,
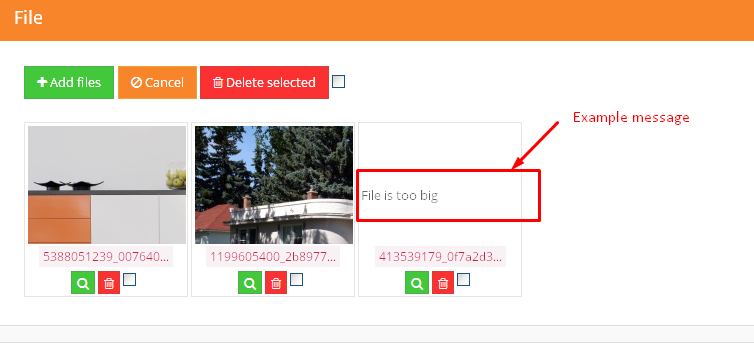
You will receive warning like this:

Customizations related to Real estate agency portal
Edit file application\libraries\UploadHandler.php, line 86:
‘max_file_size’ => null,
You will receive warning like this:
Please follow guide from template, like:
http://geniuscript.com/wbooking/user_guide_theme/#!/custom_search_form
Depends on which template file you using, for example: templates\bootstrap2-responsive\components\search-filter.php line around 23, add additional input… (You should not copy paste from this website, but from your file and modify, because of possible “quote” formatting issues or changes in your script version)
Example to find FROM some number:
<input id="search_option_20_from" type="text" class="span2" placeholder="From bedrooms" />
Example to find TO some number:
<input id="search_option_20_to" type="text" class="span2" placeholder="To bedrooms" />
Example to find EQUAL, same number:
<input id="search_option_20" type="text" class="span2" placeholder="To bedrooms" />
For this situation example you also need to change field type to short input in Administration…
Also very helpfully for customization is example search form, so check out code in this and other search form files: search-filter.php
For new inovative search form on right side:
Also templates\bootstrap2-responsive\components\search-filter.php and additional templates\bootstrap2-responsive\page_homepage-filters.php, lines 153-209, same field on 2 places, one time in above mentioned files.
NOTICE: Don’t removed top primary searchbar, this custom search can’t work without primary top, so you should restore top search. If you want to hide it you can hide via css (style=”display:none;”), but not remove completely from HTML!
For >=v1.5.4 If you want that textfield become numeric searchable you should add in database “property_lang” table, add
field_136_int in type int. Then resave all properties. 136 is example of field ID.
For >=v1.5.6 If you want that textfield become numeric searchable Admin->Real estates->Fields->Edit wanted and click on “Enable numeric filtering”:

After that you should resave all properties
For >=v1.5.7 right search form is moved to widget:
templates\bootstrap2-responsive\widgets\right_customfilter.php
You can for example edit templates\bootstrap2-responsive\property.php
And infos that need to be hidden for not-registered users, hide with something like this:
<?php if(count($not_logged)==0): ?>
//Your secret info here
<?php endif; ?>
If this is what you want, you owe me a beer ![]()
Default font can be changed with css file customization, templates\bootstrap2-responsive\assets\css\styles.css, line around 257 or find code and change:
font-family: "Open Sans","Arial",sans-serif;
Default css files for template:
\templates\bootstrap4\assets\css\winter-flat.css
\templates\bootstrap4\assets\css\custom.css
For change font size of menu, add into \templates\bootstrap4\assets\css\custom.css
.menu .nav-link {
    font-size: 12px;
}
Similar way also for other themes
In version >=1.5.4:
Admin->Pages->Edit->change header template
In versions <=1.5.3:
There is 2 version of homepage templates, “homepage” and “homepage-slideshow”, you can select wanted template.
You want to replace map with slider on all pages?
Can be done with wanted template file customizations, just replace part of code that showing map, with part of code that showing slider, for example on classic page_page.php located in folder: templates\bootstrap2-responsive
Replace:
<input id="pac-input" class="controls" type="text" placeholder="{lang_Search}" />
<div class="wrap-map" id="wrap-map">
</div>
With this code:
<div class="wrap-map">
<div id="myCarousel" class="carousel slide">
<ol class="carousel-indicators">
{slideshow_images}
<li data-target="#myCarousel" data-slide-to="{num}" class="{first_active}"></li>
{/slideshow_images}
</ol>
<!-- Carousel items -->
<div class="carousel-inner">
{slideshow_images}
<div class="item {first_active}">
<img alt="" src="{url}" />
</div>
{/slideshow_images}
</div>
<!-- Carousel nav -->
<a class="carousel-control left" href="#myCarousel" data-slide="prev">‹</a>
<a class="carousel-control right" href="#myCarousel" data-slide="next">›</a>
</div>
</div>
You can also replace map with other type of content, if you need css customization, can be done in file: templates\bootstrap2-responsive\assets\css\styles.css
If you want to pause carousel then you can use something like this:
<script language="javascript">
$(document).ready(function(){
    $("#myCarousel").carousel('pause');
});
</script>
If you want to change template, then file:
application\errors\error_404.php
1. Admin->Real estates->Fields->Edit area->Change from Type dropdown to short input
2. Additional you need change wanted template files, for example templates\bootstrap2-responsive\components\search.php, line 15-17:
<select id="search_option_3" class="span3 selectpicker nomargin" placeholder="{options_name_3}">
{options_values_3}
</select>
Replace with:
<input id="search_option_3_from" type="text" class="span3" placeholder="{lang_From} ({options_prefix_3}{options_suffix_3})" />
<input id="search_option_3_to" type="text" class="span3" placeholder="{lang_To} ({options_prefix_3}{options_suffix_3})" />
Of course, you probably will need also small css fixes to show it nicely.
Developers basic skills needed for this, if you are nor familiar check guide to ask for customization (cost additional): http://iwinter.com.hr/support/?page_id=1870
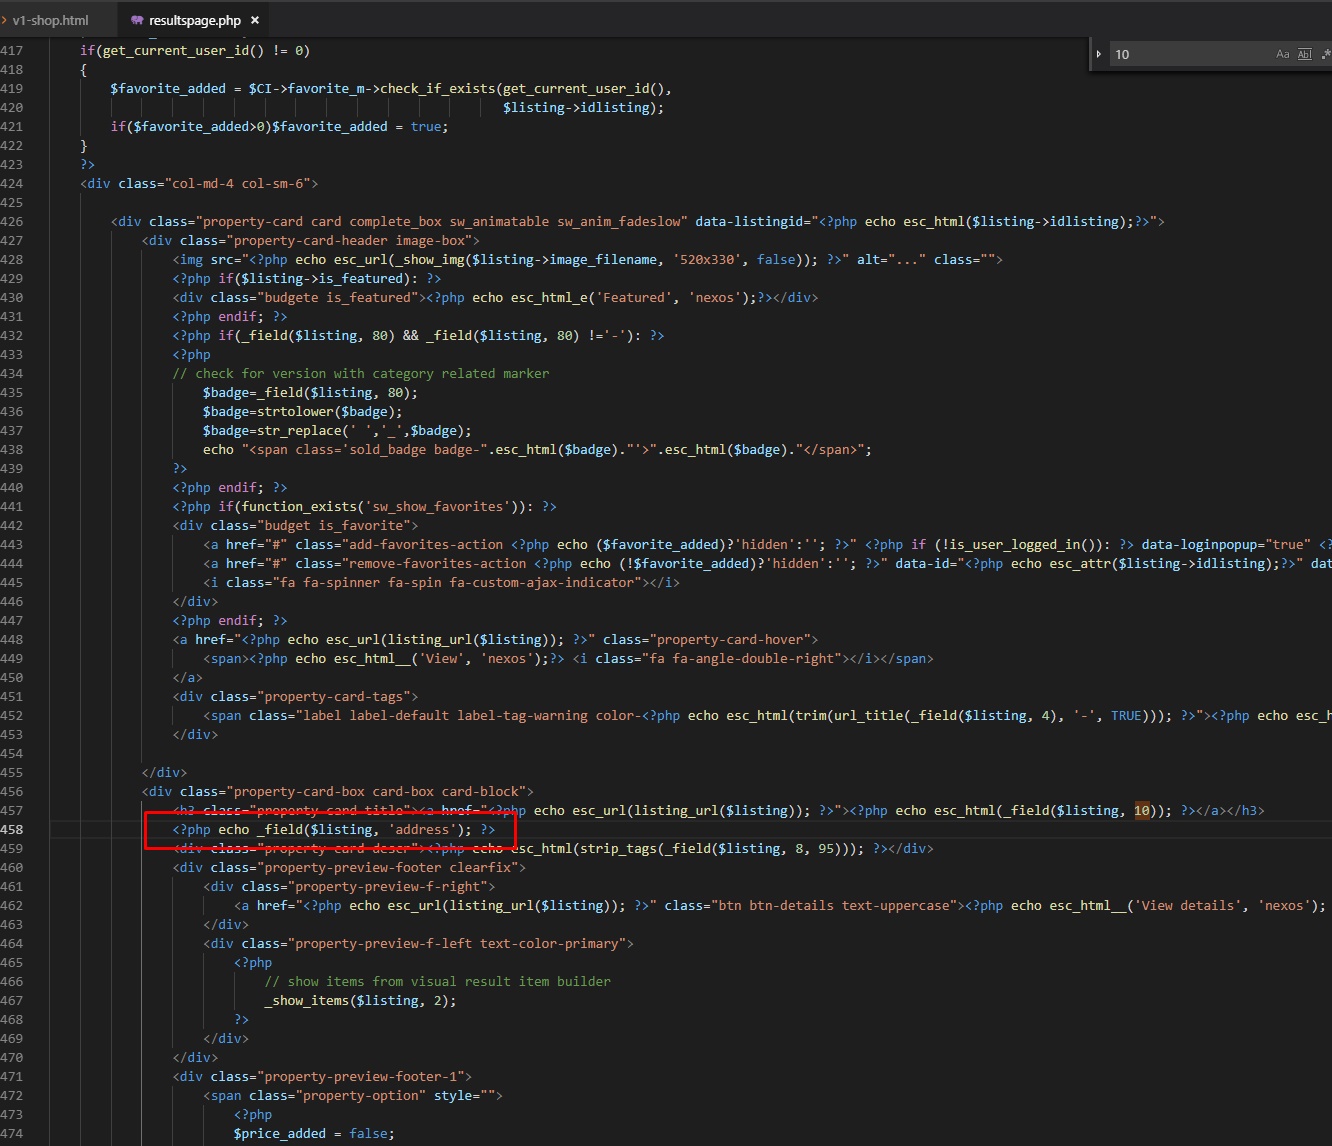
You need to modify file SW_Win_Classified\views\frontend\resultspage.php in your theme, usual location for nexos theme:
wp-content\themes\nexos\SW_Win_Classified\views\frontend\resultspage.php
Example to add address:
results:

Example for location or very custom fields:
Basically copied from wp-content\themes\nexos\SW_Win_Classified\views\frontend\listingpreview.php

example results:

For grid version you can edit content in: templates\{your_template}\widgets\results_item.php
And for list version templates\{your_template}\results.php
General HTML customization guide: http://iwinter.com.hr/support/?p=2076
For initial results listing, you should edit template file selected when editing pagem for example templates\bootstrap2-responsive\page_homepage.php, begining from line around 122, {results} … {/results}:
For example if you want to change bathrooms with badrooms, replace:
<p class="bottom-border">{options_name_19} <span>{option_19}</span></p>
with:
<p class="bottom-border">{options_name_20} <span>{option_20}</span></p>
Number represents field/option ID#
For results listing when clicking to search button, you should edit templates\bootstrap2-responsive\results.php, lines from 30-115, same thing but 2 times (for grid view type and list view type), same thing, so:
For example if you want to change bathrooms with badrooms, replace 2 times (line 45 and line 88):
<p class="bottom-border">{options_name_19} <span>{option_19}</span></p>
with:
<p class="bottom-border">{options_name_20} <span>{option_20}</span></p>
Number represents field/option ID#
For version >= 1.5.5 all email templates can be found in: application\views\email or in admin->settings->design template->Email templates editor
Logo image can be changed: ‘admin-assets/img/stamp.png’
For version >= 1.5.3 many email templates can be found in: application\views\email
For version <=1.5.2 or some specific emails:
Please login to read this.
Standard template doesn’t support this functionality. This template supports list view by default, most easier way is to use this template instead of default: https://codecanyon.net/item/real-estate-retro-template-03/13522785
This customization require PHP+HTML knowledge! If you are not familiar with PHP, please send your request to our customization services: http://iwinter.com.hr/support/?page_id=1870
It’s supported by default in theme: http://codecanyon.net/item/real-estate-retro-template-03/13522785
General guide for all templates:
Code to show list view can be found in:
templates\{your-template}\results.php, inside:
{has_view_list} all code in middle {/has_view_list}
This code can be copied into your template which one you using.
Usually this can be found in:
templates\{your-template}\widgets\center_recentproperties.php
Or if you want to customize bootstrap2 template then:
Open for example templates\bootstrap2-responsive\widgets\center_recentproperties.php, around line 29-41 replace this:
<?php foreach($results as $key=>$item): ?>
<?php
   if($key==0)echo '<ul class="thumbnails">';
?>
    <?php _generate_results_item(array('key'=>$key, 'item'=>$item)); ?>
<?php
   if( ($key+1)%4==0 )
    {
        echo '</ul><ul class="thumbnails">';
    }
    if( ($key+1)==count($results) ) echo '</ul>';
    endforeach;
?>
With this (from templates\bootstrap2-responsive\results.php):
<ul class="thumbnails">
<?php foreach($results as $key=>$item): ?>
<li class="span12 li-list">
<div class="thumbnail span4 f_<?php echo _ch($item['is_featured']); ?>">
<h3><?php echo _ch($item['option_10']); ?> </h3>
<img alt="" data-src="" style="width: 300px; height: 200px;" src="<?php echo _simg($item['thumbnail_url'], '260x191'); ?>" />
<?php if(!empty($item['option_38'])):?>
<div class="badget"><img src="assets/img/badgets/<?php echo _ch($item['option_38']); ?>.png" alt="<?php echo _ch($item['option_38']); ?>"/></div>
<?php endif; ?>
<?php if(!empty($item['option_4'])):?>
<div class="purpose-badget fea_<?php echo _ch($item['is_featured']); ?>"><?php echo _ch($item['option_4']); ?></div>
<?php endif; ?>
<?php if(!empty($item['option_54'])):?>
<div class="ownership-badget fea_<?php echo _ch($item['is_featured']); ?>"><?php echo _ch($item['option_54']); ?></div>
<?php endif;?>
<img class="featured-icon" alt="Featured" src="assets/img/featured-icon.png" />
<a href="<?php echo _ch($item['url']); ?>" class="over-image"> </a>
</div>
<div class="caption span8">
<p class="bottom-border"><strong class="f_<?php echo _ch($item['is_featured']); ?>"><?php echo _ch($item['address']); ?></strong></p>
<p class="bottom-border"><?php echo _ch($options_name_2); ?> <span><?php echo _ch($item['option_2']); ?></span></p>
<p class="bottom-border"><?php echo _ch($options_name_3); ?> <span><?php echo _ch($item['option_3']); ?></span></p>
<p class="bottom-border"><?php echo _ch($options_name_19); ?> <span><?php echo _ch($item['option_19']); ?></span></p>
<?php if(!empty($item['icons'])):?>
<p class="prop-icons">
<?php
foreach ($item['icons'] as $icon) {
echo $icon['icon'];
}
?>
</p>
<?php endif;?>
<p class="prop-description"><i><?php echo _ch($item['option_chlimit_8']); ?></i></p>
<p class="prop-button-container">
<a class="btn btn-info" href="<?php echo _ch($item['url']); ?>">
{lang_Details}
</a>
<?php if(!empty($item['option_36'])):?>
<span class="price"><?php echo _ch($options_prefix_36); ?> <?php echo _ch($item['option_36']); ?><?php echo _ch($options_suffix_36, ''); ?></span>
<?php endif;?>
<?php if(!empty($item['option_37'])):?>
<span class="price"><?php echo _ch($options_prefix_37); ?> <?php echo _ch($item['option_37']); ?><?php echo _ch($options_suffix_37, ''); ?></span>
<?php endif;?>
<?php if(!empty($counter)): ?>
<span class="res_counter">{lang_ViewsCounter}: <?php echo _ch($item['counter_views']); ?></span>
<?php endif;?>
</p>
</div>
</li>
<?php endforeach;?>
{/has_view_list}
</ul>
Additional you should change active class from grid to list link/icon, line around 4-5 in center_recentproperties.php
Open for example templates\bootstrap2-responsive\page_homepage.php, around line 123-162, replace this:
<li class="span3">
<div class="thumbnail f_{is_featured}">
<h3>{option_10} </h3>
<img alt="300x200" data-src="holder.js/300x200" style="width: 300px; height: 200px;" src="{thumbnail_url}" />
{has_option_38}
<div class="badget"><img src="assets/img/badgets/{option_38}.png" alt="{option_38}"/></div>
{/has_option_38}
{has_option_4}
<div class="purpose-badget fea_{is_featured}">{option_4}</div>
{/has_option_4}
<a href="{url}" class="over-image"> </a>
<div class="caption">
<p class="bottom-border"><strong class="f_{is_featured}">{address}</strong></p>
<p class="bottom-border">{options_name_2} <span>{option_2}</span></p>
<p class="bottom-border">{options_name_3} <span>{option_3}</span></p>
<p class="bottom-border">{options_name_19} <span>{option_19}</span></p>
<p class="prop-icons">
{icons}
{icon}
{/icons}
</p>
<p class="prop-description"><i>{option_chlimit_8}</i></p>
<p>
<a class="btn btn-info" href="{url}">
{lang_Details}
</a>
{is_purpose_sale}
{has_option_36}
<span class="price">{options_prefix_36} {option_36} {options_suffix_36}</span>
{/has_option_36}
{/is_purpose_sale}
{is_purpose_rent}
{has_option_37}
<span class="price">{options_prefix_37} {option_37} {options_suffix_37}</span>
{/has_option_37}
{/is_purpose_rent}
</p>
</div>
</div>
</li>
With this (from results.php):
<li class="span12 li-list">
<div class="thumbnail span4 f_{is_featured}">
<h3>{option_10} </h3>
<img alt="300x200" data-src="holder.js/300x200" style="width: 300px; height: 200px;" src="{thumbnail_url}" />
{has_option_38}
<div class="badget"><img src="assets/img/badgets/{option_38}.png" alt="{option_38}"/></div>
{/has_option_38}
{has_option_4}
<div class="purpose-badget fea_{is_featured}">{option_4}</div>
{/has_option_4}
<a href="{url}" class="over-image"> </a>
</div>
<div class="caption span8">
<p class="bottom-border"><strong class="f_{is_featured}">{address}</strong></p>
<p class="bottom-border">{options_name_2} <span>{option_2}</span></p>
<p class="bottom-border">{options_name_3} <span>{option_3}</span></p>
<p class="bottom-border">{options_name_19} <span>{option_19}</span></p>
<p class="prop-icons">
{icons}
{icon}
{/icons}
</p>
<p class="prop-description"><i>{option_chlimit_8}</i></p>
<p>
<a class="btn btn-info" href="{url}">
{lang_Details}
</a>
{is_purpose_sale}
{has_option_36}
<span class="price">{options_prefix_36} {option_36} {options_suffix_36}</span>
{/has_option_36}
{/is_purpose_sale}
{is_purpose_rent}
{has_option_37}
<span class="price">{options_prefix_37} {option_37} {options_suffix_37}</span>
{/has_option_37}
{/is_purpose_rent}
</p>
</div>
</li>
Additional you should change active class from grid to list link/icon, line around 99-100 in page_homepage.php
Please login to read this.
Sandbox is configured in development mode.
Instructions for development mode configuration:
Please login to read this.
Please login to read this.
You can enter small hack, something like this into your Admin->Edit wanted page->navigation title then:
<img src="assets/img/home-icon.png" alt="Home" />
If you want to hide it then in application\helpers\cms_helper.php, comment or remove this like:
$item['navigation_title'] = '<img src="assets/img/home-icon.png" alt="'.$item['navigation_title'].'" />';
Please login to read this.
County and city don’t have special tables, saved in property_value,
Please login to read this.
Num images limit can be now limited with packages module: http://iwinter.com.hr/support/?p=4635
This can’t be limited by default, but I have simple customization to limit on listing (show only first 5 images):
Please login to read this.
Example:
In script version >= 1.5.4 color can be selected in admin->settings->design template
Logout is required after that
For older script versions:
If you want to specify color, in ‘application/config/cms_config.php’ add line
$config['color'] = 'red';
If you need customization of specific color theme, css file is:
templates\bootstrap2-responsive\assets\css\styles_red.css
you can also add your own color like:
templates\bootstrap2-responsive\assets\css\styles_mycolor.css
Then you should also create marker folder, example:
/assets/img/markers/mycolor/
can be also empty, then default markers will be used
bootstrap2-responsive is just template example so if you using other this may be selio, local or other template file but urls are usualy same
Just replace following images:
NOTE: After change images don’t forget to refresh multiple times and clear your browser cache to see changes!
For facebook share image, you need to wait few days that facebook cache changed images or via facebook debugger speed up the process: https://developers.facebook.com/tools/debug/
On admin dashboard part there is small logo:
admin-assets/img/custom/logo-system-mini.png
And text right of logo:
In administration, there is also text with logo, defined in file application\views\admin\_layout_main.php, line 14
Admin window title:
Available in language files: Admin->Settings->Languages->Translate wanted language->backend_base_lang.php->Change “Real Estate Point”
Favicon icon:
admin-assets/img/favicon/favicon.png
NOTE: After change images don’t forget to refresh multiple times and clear your browser cache to see changes!
For more details please read article: http://iwinter.com.hr/support/?p=71
Change this image: admin-assets/img/stamp.png
In new script version >= 1.5.9. can be done even via admin->settings
File for HTML footer logo iwinter: templates\realsite\widgets\footer_allreserved.php
First you should buy another hosting package for your website, my suggestion where everything is tested and works nice:
![]()

Script using advanced hashing methods to protect passwords saved in database, if your server doesn’t support same as localhost, then login will not work on any account.
In that case you should register new account, and manually define it as admin to login as admin, for this you should:
Login to your Cpanel->PHPMyAdmin->Open database table users and change type of added user to ADMIN:
